To add images or files to your website you must first add them in File Manager. Before we dive into the specifics of uploading your files, let’s take a look at some of the components that make up the file manager.
In your Dashboard, you will see a tab on the left-hand side labeled “File Manager” (highlighted below). Click on the file manager tab.

The screen will look like this when it opens:

The first group of icons in the file manager directly relates to adding files into the system: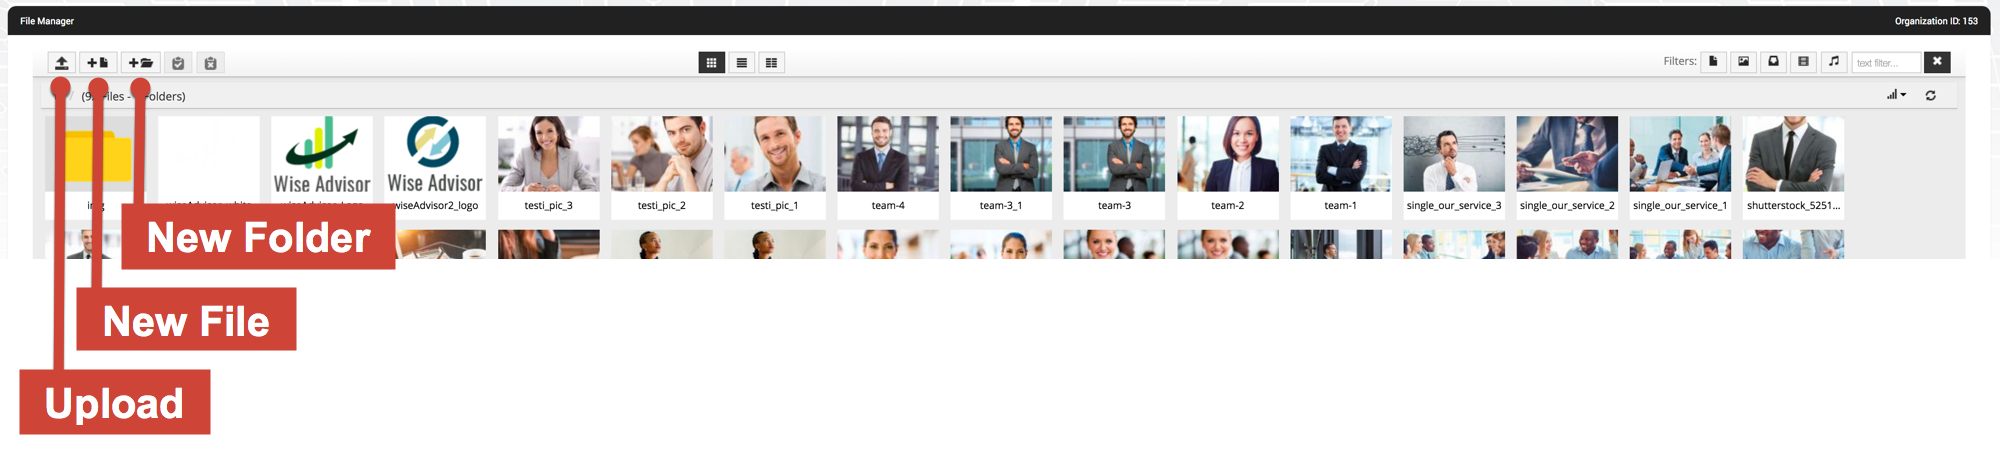
The second group of icons changes your view of any files you have uploaded:
The first icon is “Box View.” It displays files in a boxed layout:

The second icon is “List View,” which displays files as a singular list:

The third icon is “Columns List View,” which displays the files as listed columns: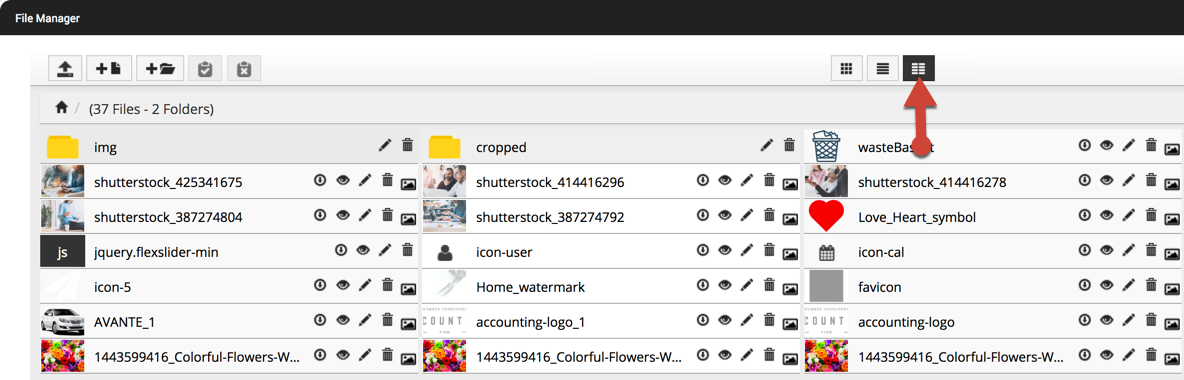
Finally, the last group of icons above the files in File Manager are the Filters, which allow you to separate files by type:

Each icon is a file type that can be filtered:

Now that you have a better understanding of what action each icon performs within file manager, let’s begin the process of uploading files.
After selecting the File Manager, select the upload icon:

A window will open that will allow you to drag and drop files (images, pdfs, videos, and audio clips) in the area.
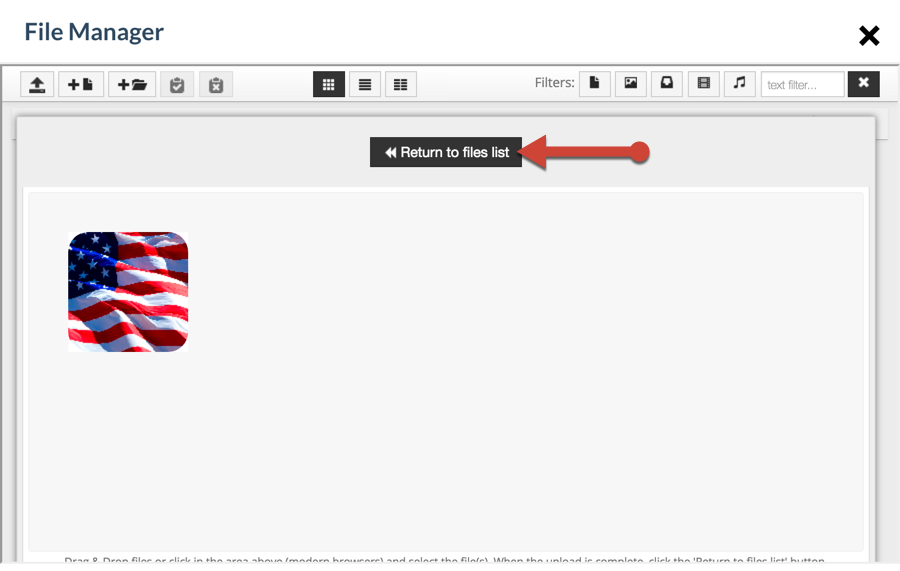
Clicking in the “drop files here or click to upload” section and a window will open allowing you to select files from your computer to add to File Manager.
After you have selected your desired files, click on the “Return to files list” button.
Voila; your files are now ready to be added to your website.
But wait! What if you’ve added files to the file manager that you didn’t intend to be there? No worries, it is easy to remove unwanted files within the file manager system:

Locate the file you wish to delete and select the garbage can icon , click on the icon to remove.
A prompt will appear asking if you’re sure you wish to delete the selected file, If you’re sure click OK.
What if you’d like to view, edit or rename a file that you’ve uploaded?

To preview an uploaded file, locate and select the file in the file manager and click on the preview icon:

To edit an uploaded image, locate and select the file in the file manager and click on the edit icon:


 on the selected file: